Archive for the ‘Equipment’ Category

2013 – A Look Forward

Saturday, January 12th, 2013


to blog or not to blog


The year is off to a fantastic and a hectic start – Busiest. Winter. Ever!  I have already had several photo shoots, prepared a new program and gave a presentation to the RA Photo Club, organized and booked 3 more Studio Portrait Lighting Workshops,  and of course spent far too many hours in front of the computer. However, one of the things that I haven’t done is post very much to this blog. So much so, that several people have written asking what happened. While I do post often, very often, on my Facebook pages – it is usually only photos.   I have always left my blog for articles, announcements, tips and techniques or reviews.  But I am curious, what would you like to see here? Photos? What other information can I share with you?  What do you want more of?  Drop me a line, either in the comments below or email.

Hope your year is starting off great!

Henry’s Ottawa Exposure Show

Friday, November 16th, 2012

Canon 5D MKII - Sigma 120-400 f/4.5-5.6 DG OS @F14-1/60sec 200 ISO


This weekend Nov 16-18, I will be giving several presentations at the Henry’s Exposure Show in Ottawa at the CE Centre. The topic of my presentation is “The Secrets of Creating WOW in your Photos” Hope to see you!!!!!!

Friday 1:30 – 2:15
Saturday 12:30 – 1:15
Sunday 11:30 – 12:15

If you can’t make it to my presentation I will also be at the Sigma Booth all weekend long.

Lightsphere in the Studio

Friday, November 2nd, 2012

Studio Shoot with Gary Fong Lightsphere


After my success in using the Gary Fong Lightsphere on outdoor shoots, I decided to give it a try in the studio. I was shooting with the flash off camera, holding it high above my head in my my left hand and directed towards Virginie with the white dome in place. The effect it creates is very similar to a beauty dish. I like it!!!!

Studio Photo Shoot

Model: Virginie Bouchard
MUA: Bianca Scantland
Photographer: Garry Black

Lighting – Gary Fong Lightsphere + Canon 580EX II

Canon 5D MKII – Sigma 70-200 F2.8 @ 112mm F11 ISO 100

More Lightsphere Lighting

Wednesday, August 29th, 2012

Here is a  set of comparison photos of Nessa showing the difference between using only natural light and using the Lightsphere Collapsible diffuser. The photos were taken early evening in open shade on a clear day and about a minute apart from each other, in exactly the same location. The amount of time I spent post processing is the same in both images. Basically all I did is I took one shot just using natural light, then took the other using flash (Canon 580 EXII) with the Lightsphere. The difference between these two photos is really amazing. I know which one I like better.

Canon 5D MKII – Sigma APO 70-200 F2.8 EX DG


Gary Fong Lightsphere

Thursday, August 23rd, 2012

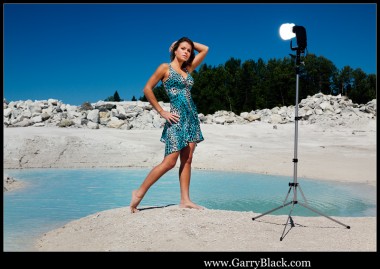
I’ve known about Gary Fong’s light modifiers for years, I’ve seen them all over the place. In fact, I’m sure that most photographers must either have one, or like me at least know about them. However it wasn’t until a couple of weeks ago when I picked up the Gary Fong Pro Lightsphere Kit that I actually used one. Oh yes, and while my wallet was open getting the Lightsphere Kit, I dug a little deeper and also bought the Pocket Wizard Mini TT1 and Flex TT5 radio transmitters and receivers. I had heard about their capability of using higher shutter speeds that go far beyond the standard X-Sync speeds. Both of the these images were shot at 1/1000 second using a flash, which I think is pretty amazing, considering that the highest I could possibly go without the PW is 1/250. In fact, with the HyperSync feature I can actually go all the way up to 1/8000.

Now while the most common use of the Lightsphere is indoors where it is used to create soft diffused light, my intention was to use it as a fill light outdoors. The effect I wanted to achieve using my Canon 580 EXII flash and the Lightsphere was a softened effect rather than the harsh/contast light that I would get from just using the direct flash. I placed the dome (curved side outwards) on the top of the Lightsphere and directed it straight at Pascale. (PHOTO #1)

Lightsphere with Dome/Pocket Wizard Flex TT5 and Pascale


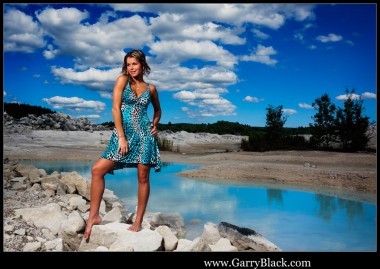
It worked perfectly,  filling in the shadows, creating a soft diffusion that evened out the contrasty light of mid afternoon. As we were shooting, the sky quickly changed from wall-to-wall clear to thick white puffy clouds. As the clouds passed in front of the sun they created a silhouette on the land below, basically putting the entire scene in shade. Using the same exposure settings in this “shade” now created a very dramatic image, one that almost looks like the actual scene is a backdrop (PHOTO #2)

Flash with Lightsphere is now the main light, as entire scene is in shade


While this is not a review of the Lightsphere or the Pocket Wizards, I have to say that after having used them on a couple of shoots these are going to be really useful tools to add to my camera bag.


I know you’re out there somewhere

Thursday, May 3rd, 2012

Spring in London


Every time that I post a photo or an article either on Facebook, Google+ or here, there  are usually some people who will comment or “Like” it.  However, there are also a large number of other people who never comment, which is Okay…but I now know that you are out there.

This past week I was in London Ontario giving a presentation and a 2 day workshop for the London Camera Club. I noticed that quite a few people were using the Sigma 70-200 F2.8 EX lens. I mentioned to them that I was one of the Canadian Sigma Pro Photographers. To my surprise, everyone already knew that and they had also seen my post about how I loved the bokeh (out-of-focus blurring) that this lens produces.

Tomorrow I am leaving for Greece where I will meet-up with my photography workshop group, I can’t tell you how excited I am to be going back!  Usually, in the past when I have been away teaching I rarely post any photos. But now that I know, YOU are out there I will try to post a few of the photos from the trip.

Tripods…for Sale or Rent/Rooms to let…fifty cents

Friday, March 23rd, 2012

For some strange reason I was thinking about Roger Miller’s song “King of the Road” when I was trying to come up with a headline for this post.

Yesterday I picked up the new Canon 5D MKIII camera. Then when I got home I discovered that the Really Right Stuff L-Bracket from the 5D MKII didn’t fit the new camera. My wife wasn’t too thrilled about that, as I had told her that the camera was the only thing I was going to buy. To make a long story short, she suggested that I should part with all of the backup tripods that I have and don’t use. So here are four tripods that I have for sale, all are in excellent condition.  If you happen to be interested in a old beat up tripod, I have one of those too.

MANFROTTO TRIPODS

#190B (previous version to this one)     3-section black aluminum tripod W/ 3 Way Pan Tilt/Head and 354 quick release plate……….$90,.00

#190B   (previous version to this one)    3-section black aluminum tripod W/ 484 RC2 Ball Head and quick release plate……….$90.00  SOLD

#055CB    3-section black aluminum tripod W/Super 3D 229 Head and quick release plate……….$180.00

#075B      3-section black aluminum tripod W/Super 3D 229 Head and quick release plate. This tripod is huge and heavy it is designed for large or medium format cameras……….$225.00


Interested? Contact me: email or Phone: 613-824-9295

Wacom Tablet or Mouse?

Sunday, March 18th, 2012

Maybe I can paint?

Yesterday on Facebook  a friend of mine asked the question “How many friends use a Wacom Tablet for Post Photo work?  What do you think of it and does the Wacom make Post Photo work easier to do than a mouse?”

Some of the answers were:

“Absolutely use a tablet! You’ll wonder how you ever used a mouse before.”

“I have one, but I ended up with my mouse. I have spent so much time with a mouse, I just couldn’t make the transition.”

“I have been using one for years. Love it. Can’t work without it!”

“I have one but I am finding it very very hard to not use the mouse, I have been using it for so long.”

My answer was “A Mouse! I can’t draw a straight line with a pen and my handwriting looks like chicken chicken scratch! However I really good using a mouse.” Now while I don’t use a tablet, I know many people who do use them and they swear by it. If I were to use a tablet, I would probably just swear at that it.

That got me thinking about my attempts at drawing and painting with paper, pens, pencils, paints etc. My experience with that medium has been pretty much a complete disaster, going all the way back to elementary school. I have always been able to see in my mind what I wanted to create, but my eye-hand coordination just wouldn’t co-operate.  I have always wanted to be able to paint and draw, and you know what now with my mouse and Photoshop, I can!


So what do you use for Post Photo work : Wacom Tablet or Mouse?


UPDATED MARCH 24, 2012

Here are some of the comments from my Facebook friends.

Steph K: “ Yeah, buy one :-)”

Andrew K: “ Wacom tablet by far! After using a tablet a mouse feels like you are using a brick!”

Rob S: “ You don’t have to give up the mouse though. Tablet on the left, mouse on the right, keyboard in the middle. :)”

Rich G: “ I am right handed so I use tablet on right but honestly after a few weeks a mouse will feel like you are cheating poorly on your hand! You will regret grabbing the mouse.. I have an original Intuos 9×12 purchased in 2002 or so…I hardly use it now due to the fact I have little real estate for it at my new house. I think it’s time for a 5 Medium, not only that but my arm gets tired from having to move so much on the 9×12. Got to check and see if the older pads can be mapped smaller, large would be good for dual monitors with mapping 50% of the pad to each screen.”

Andrew K: “ Just ordered the Intous5 Medium. Have always used the Medium size. Tried out the Small but felt too restrictive.”

Steph K: “I have the small Intuos5 and LOVE it!! I had a Intuos4 Medium previously. BTW LOVE LOVE LOVE the hand gestures that you can set up…….. very cool.”

David L: “I just started using a Wacom bamboo capture pen/touch and I love it. My workflow has been sped up and I find myself switching to touch and have gotten rid of my mouse all together. Getting my tablet was the best thing I did. I will eventually upgrade to the intuos as I didn’t have the money which is why I got the capture. The capture is great but you don’t have as many options as you do with the upper end Wacom’s. Having a few more preset button would be nice.”

Roger W: “Using an Intuous 4 wireless – great!”

Stan K:  “Tablet -it’s faster and more precise- for Photoshop manipulations and heavy edits. -Mouse-for adjustments in Lightroom .”

Gilles V: “I love my Cintiq 12″, great for detail work.”

David P: “ I use both: the tablet (Intuous2, 6×8) for anything where I’m using a brush (e.g. masking, dodging/burning, etc.); for pretty much everything else I use the mouse.”

Barry F: “I tried to comment on the blog but got blocked. I’m in the tried to but can’t draw a straight line camp. So I have one but use the mouse. Not as well as you but I’m working on it.”

Garry Black:  “Barry all the comments on the blog have to be moderated, or else there is a ton of SPAM comments. So when you post a comment, it won’t show up for a little while.If you are using a mouse the size/shape is important, I spent ages trying many different styles before settling on a Logitech MX700, which has now been discontinued.”

Sheila R: “I love the tracPad, have barely touched a mouse since it came out. I use Intuos4wireless when editing.”

Tom B: “ I’m the same with the mouse. I’m just used to it.”

Barry T: “I just adjust my hand to fit – I did find it’s like driving (years ago) my race car, you have to look where you want to go not where you are.”


Carol N: “ I could not live without my Wacom! For detail-editing work, and for building photo-composites. As I can spend hours doing work of that perfectionist nature, I cannot imagine using a mouse… when I do my hand takes a beating! Some folks get a tablet that is too big… I have a huge one in one location and a smaller one in another… the big one is great for motions like drawing. For photo-retouching the small one is just fine… somewhat mores scrolling, that`s all.”

Barry T: “ Carol what is smaller in inches?”

Carol N: “ my smaller tablet = working area 6.5 x 8.8.25 inches. Large one is twice as big (at least 14 W), good for larger arm movements.”


Tamrac Evolution 8 Backpack Review

Wednesday, January 25th, 2012

This is Part II of the review for the Tamrac Evolution 8 Backpack,  Part I is the back story of how this review came about. My assistant and fellow contributing writer/reviewer for this article is Roxann Hickey.  We both want to make it clear that we are not employees of Tamrac, did not receive any money nor are we spokespeople for any camera bag manufacturer. This review contains  our honest opinions and judgments.

This was Roxann’s 1st camera bag, if you don’t count the one that she got when she bought her camera. This is my 101st camera bag, I also got a “free” bag with my first camera (Nikon FE) it was a navy blue canvas Nikon sack. It was a piece of junk!  I got rid of that one quickly. Does anyone still use or even have their 1st bag?

In my experience there is no one right or perfect camera bag, that’s why I have had 101 of them. I’ve had many different brands, different designs and every different type of bag imaginable, including photo vests. I still use some of these bags, but most of them are long gone, either given away or ended up at the curbside. The reason why I have and also use so many bags is because of the different types of travel or shoot that I am doing.

Just when you think you have the perfect bag, you go ahead and buy that new lens, another camera body or flash and all of a sudden everything doesn’t fit in the bag anymore. Sound familiar?

So what do you look for when buying a bag, hopefully something that will carry your gear safely and comfortably.  That sounds simple enough, but walk into any camera store and see the wall of bags and you know it’s not that simple.

How did Roxann and I both end up getting exactly the same bag with so many to choose from?  Roxann spent days, weeks maybe even months researching all the different bags on the Internet. For her this is what was important:

  1. Backpack style
  2. Separate compartments and plenty of pockets/storage
  3. Space for 13″ net book
  4. Tripod holder for carrying tripod
  5. Easy access to equipment
  6. Rugged construction…..to quote her “I’m tough on stuff”
  7. Colour option – didn’t want black. Wanted something that would be different and stand out from all those black backpacks.

After doing all of that on-line research she had it narrowed down to a few possibilities. When she arrived at the camera store, the wall bags didn’t look that daunting, it took her less than 10 minutes to select the Tamrac Evolution 8.

Why did I choose this bag? I didn’t spend nearly as much time researching it as Roxann did, but like her, I also looked on-line to compare the different bags that are available.  When I saw the line of Tamrac bags I was surprised, for some reason I don’t recall seeing or hearing very much about Tamrac bags in recent years from Canadian retailers. Back in the 80’s and 90’s I used a huge Tamrac bag for my Pentax 6×7 camera system. I do remember buying that bag. I had paid a fortune for the equipment so I wanted a bag that would protect it, the Tamrac (I don’t remember the model, but I am sure it was long discontinued anyway) was perfect. It was well made, rugged and everything fit. It was a huge shoulder bag and  unbelievably heavy with all the equipment.  Even though I was much younger then,  my shoulder, neck and back were killing me at the end of the day.   Over the years, I have seriously tried to cut down on what I carry and also to carry it more sensibly.

While I still occasionally use shoulder bags for certain assignments or  locations, I now prefer to use a backpack for most of my photography. It’s funny, because up until recently I hated backpacks.  They seemed great for carrying equipment around, but as soon as you wanted to get something out of them, it became difficult. Today there are a couple of manufacturers that make backpack bags that allow you to access the contents of the backpack without having to put it down on the ground. You slip it off one shoulder, slide the bag to your side and you can get to your camera via a side zippered flap. The Tamrac is the only one (that I know of) which has a side flap on both the right and left sides.

In selecting a new backpack, my two main criteria were – will it fit on a plane as a carry-on and can I fit everything that I have into it?

The dimensions of the Evolution 8 are: 12.5 in W x  8.8 in D x 19.0 in H.  This is well within most airlines’ carry-on allowance size. There is a slightly larger bag, the Evolution 9 but it’s depth dimension is two inches too large. You might get away with it using it as a carry-on, but I wouldn’t want to risk it, especially since airlines are really clamping down on luggage restrictions.

The layout of this backpack really works, it enables me to carry alot of my gear very comfortably. I can easily fit one or two cameras, 3 -4  lenses as well as a set of extension tubes and various  accessories (cable release, spare batteries, filters) as well as my 15″ laptop.

Our separate comments appear as  R for Roxann and G for Garry.  All photos show Roxann’s bag and gear.


Manfrotto 190X Pro B Tripod with 496RC2 Head

R:  One of the first things I noticed about the bag was the high quality of manufacturing and materials. It is very sturdy and well padded to protect camera equipment. What amazed me is that the bag stands up, it doesn’t flop over even with the tripod attached it. One of the features that this bag has, is that it can be used as a “sling type” bag, however neither Garry nor I have ever used it that way.

G: The overall construction of the bag is excellent, the attention to detail is something that caught my eye. Great idea to have 3-way to access photo equipment in the bottom compartment – through the front flap or through the left or right flaps/doors. To get inside the bag, you don’t have to put the bag down on the ground. When you want to put it down, the bottom has 2 rubber feet so the material doesn’t scuff or fray. There is a waterproof rain cover which completely fits over the bag, which is stored in it’s own pocket when not in use.

Manfrotto 190X Pro B Tripod with 496RC2 Head

R: It is a very comfortable backpack,  and has good padding along the back as well as straps which are extremely comfortable. The straps are also rubberized (non-slip). This provides alot of adjust-ability and secure fit. All of the harness straps can be tucked away if you want to carry it by the rubberized top handle. One thing I did notice , when you carry the bag on your back, the ends of the straps dangle in mid air after they have been adjusted to a proper length. There is no way to secure them or tuck them away.  All bags seem to have this problem.

R: One of the most important features I was looking for was the ability to attach and carry my tripod on the bag. It took a little adjusting to get it right, but it works. Another option which I haven’t tried yet, is using the optional set of straps (S-113) that can be attached to the bottom of the bag to carry the tripod.

R: Place for tripod feet should be a little larger

R: I use the top strap to hold the tripod leg, which it isn't obviously designed for

R: The tripod foot pocket is too small to properly fit 2 legs of my Manfrotto 190. It would fit better if they could make it just a little larger, but my guess is that the holder is not designed to carry such a large tripod. With the tripod attached it is impractical to have anything stored in the front flap pockets, as it might get crushed.

G: Years ago I did try using several other bags with straps to carry a tripod and was never happy with the setup. It made the bag really heavy and it always felt lopsided. Since then I never considered using any other bag as a tripod carrier.  What I use now is a Kinesis Tripod Carrying Strap.

R: - Easily fits a 13" note book/laptop

R: I use the top compartment mainly for non-photographic gear such as purse, snacks, jacket, or even instruction manuals. There is lots of room here for everything!!

G: I use the top compartment for an extra camera body, flash, lens or sometimes a camera with a wide angle zoom attached. As Roxann said, there is lots of storage here. There is also a mesh pocket that runs along the back where I store extra batteries and memory cards. My old 15″ laptop just fits in, however, it is  a really tight fit. It’s not the width that’s a problem, it’s the thickness. From what I understand this bag is a brand new design, so it is made for the newer thinner laptops. If you do have an older laptop, this is something you will want to check before buying. The large zippered pocket on the inside of the front flap is where I store my split neutral density filters.

Front flap opened on bottom compartment

R: The bottom compartment can be customized with the movable padded Velcro separators. I only have one lens and I always keep it attached to the camera. The zippers are good quality and most importantly they are really easy to find because of their large fabric and rubber tab pull. There is plenty of room for additional equipment….my birthday is coming up!

 G: For me this is the perfect bag to carry my equipment around. I don’t want a bag that is too large and bulky, or that is too small for my gear.  Tamrac has thought about everyone – there are two other sizes; a smaller and a larger version, but for me this size is perfect.

Left and right side access allows you to get to your gear without having to fully take off the backpack

R & G: The left and right hand side access to the bag is one of this backpack’s great features. You don’t have to take the bag off  to get to your equipment, all you do is slip it off either shoulder. This makes it easier, faster, safer and much cleaner as it isn’t necessary to put the bag down on the ground.

CONCLUSION

R: Overall I am very happy with this bag, it checked all the boxes for features I was looking for and so far it seems to be standing up well to the daily use.

G: While there is no one perfect camera bag, this one comes pretty close.


Studio Portrait Photography Workshop

Monday, January 23rd, 2012

This past weekend we kicked off this year’s series of photo classes and workshops with the  Basics and Beyond Workshop and also a Studio Portrait Lighting Workshop. Thanks to everyone who attended, it was a great weekend for photography!

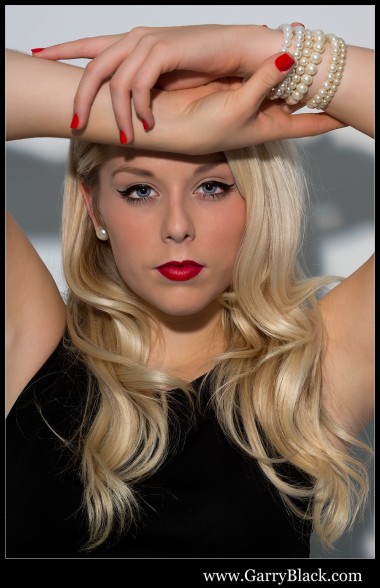
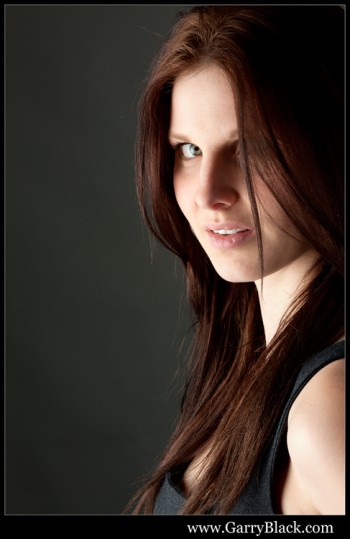
Here are a couple of photos of Tania, who was our (incredible!) model for the Portrait Lighting Workshop. Each one of the 4 photographers in this class were able to photograph Tania using the many different lighting setups and techniques that we explored during the day. We talked about styles and techniques of lighting and of course lighting equipment and accessories.

In our discussion I mentioned that a couple of my Dynalite power packs and several of my strobes are around 25 years old. Then all of a sudden it hit me WOW – 25 years that’s a long time! Where does the time go? These flashes are still working as good today as they were the day I bought them, apart from having to replace the modeling lamps. Well, maybe I could get the bearings replaced for the fan motors.  We got talking about the reliability of studio equipment, one of the participants who owns Cactus wireless flash triggers was surprised how effectively the Pocket Wizard Plus II’s that I use are.  To quote him “My Cactus remote triggers are kind of finicky, I have to wiggle them every once a while to get them working. I noticed that these Pockets Wizards work every time”.

Now I haven’t had the Pocket Wizards for 25 years, but it’s looking promising.


Ottawa Studio Lighting Workshop

Tania - Studio Lighting Portrait Workshop


Ottawa Model Photo Shoot Workshop